如何使用 GitHub Actions 同步 PDF 至 Github Pages
有些時候會需要同步文件的 PDF 檔案到網路空間上 例如履歷
在這裡我分享一下,我是如何在 Google slide 修改好文件
然後使用 GitHub Actions 同步 PDF 檔案到部落格空間的
這個方法可以適用於 Google Doc 跟 Google Slide
取得 PDF 下載網址
當你修改好你的 Google 文件之後,可以用以下連結取得 PDF 版本的檔案
https://docs.google.com/presentation/d/ file id /export/pdf
file id 可以透過以下方式取得
- 點選右上角 共用
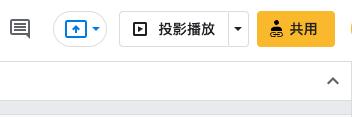
- 開啟查看權限之後,點右邊的複製連結

- 你會得到一串像這樣的網址
https://docs.google.com/presentation/d/xxxxxx/edit?usp=sharing
其中 xxxxxx 就是你的 file id
結合前面的 PDF 下載網址就會變成
https://docs.google.com/presentation/d/xxxxxx/export/pdf
整合 GitHub Actions
首先你的 GitHub Pages 要先整合 GitHub Actions
如果你跟我一樣是使用 Hexo 那就可以參考這篇
https://github.com/marketplace/actions/hexo-action
那你的 workflow 大概會長這個樣子1
2
3
4
5
6
7
8
9
10
11
12
13
14
15
16
17
18
19
20
21
22
23
24
25
26
27
28
29
30
31
32
33
34
35
36
37
38
39
40name: Deploy
on: [push]
jobs:
build:
runs-on: ubuntu-latest
name: A job to deploy blog.
steps:
- name: Checkout
uses: actions/checkout@v1
with:
submodules: true # Checkout private submodules(themes or something else).
# Caching dependencies to speed up workflows. (GitHub will remove any cache entries that have not been accessed in over 7 days.)
- name: Cache node modules
uses: actions/cache@v1
id: cache
with:
path: node_modules
key: ${{ runner.os }}-node-${{ hashFiles('**/package-lock.json') }}
restore-keys: |
${{ runner.os }}-node-
- name: Install Dependencies
if: steps.cache.outputs.cache-hit != 'true'
run: npm ci
# Deploy hexo blog website.
- name: Deploy
id: deploy
uses: sma11black/[email protected]
with:
deploy_key: ${{ secrets.DEPLOY_KEY }}
user_name: your github username # (or delete this input setting to use bot account)
user_email: your github useremail # (or delete this input setting to use bot account)
commit_msg: ${{ github.event.head_commit.message }} # (or delete this input setting to use hexo default settings)
# Use the output from the `deploy` step(use for test action)
- name: Get the output
run: |
echo "${{ steps.deploy.outputs.notify }}"
這時候就結合前上一步拿到的下載網址
再把手動啟動 Actions 按鈕 workflow_dispatch 加上去
就會變成1
2
3
4
5
6
7
8
9
10
11
12
13
14
15
16
17
18
19
20
21
22
23
24
25
26
27
28
29
30
31
32
33
34
35
36
37
38
39
40
41
42
43
44
45
46
47
48
49
50
51name: Deploy
on:
push:
branches:
- main
workflow_dispatch:
jobs:
build:
runs-on: ubuntu-latest
name: A job to deploy blog.
steps:
- name: Checkout
uses: actions/checkout@v1
with:
submodules: true # Checkout private submodules(themes or something else).
# Caching dependencies to speed up workflows. (GitHub will remove any cache entries that have not been accessed in over 7 days.)
- name: Cache node modules
uses: actions/cache@v1
id: cache
with:
path: node_modules
key: ${{ runner.os }}-node-${{ hashFiles('**/package-lock.json') }}
restore-keys: |
${{ runner.os }}-node-
- name: Install Dependencies
if: steps.cache.outputs.cache-hit != 'true'
run: npm ci
############################################
- name: Download doc
run: wget https://docs.google.com/presentation/d/xxxxxx/export/pdf
- name: Move and rename file
run: mv pdf public/any name you want.pdf
############################################
# Deploy hexo blog website.
- name: Deploy
id: deploy
uses: sma11black/[email protected]
with:
deploy_key: ${{ secrets.DEPLOY_KEY }}
user_name: your github username # (or delete this input setting to use bot account)
user_email: your github useremail # (or delete this input setting to use bot account)
commit_msg: ${{ github.event.head_commit.message }} # (or delete this input setting to use hexo default settings)
# Use the output from the `deploy` step(use for test action)
- name: Get the output
run: |
echo "${{ steps.deploy.outputs.notify }}"
這樣一來就也可以自己手動觸發更新流程了!
整合上去之後,就可以在手機上改一改
網路上的 PDF 就一起更新囉!
PS: 我原先在部落格用一個頁面轉址到 PDF 網址
但是這方法感覺不太穩,希望有大神指點迷津 QvQ